Repair details and disassemble procedure of computers, laptops, home appliances and Fitness equipment, Smart phones, LCD TV SMPS schematic and more.
Monday, 22 July 2019
Wednesday, 17 July 2019
HP mobile workstation disassembling - HP ZBook Studio G3 – How to remove the battery – How to remove the keyboard – How to replace the RTC battery
HP ZBook Studio G3 Disassembling
procedure
How
to remove Service door
Before removing the service door,
follow these steps:
1. Turn on the computer. If you are unsure whether the computer is on or in Hibernation, turn the computer on, and then shut it down through the operating system.
2. Disconnect the power from the computer by unplugging the power cord from the computer.
3. Disconnect all external devices from the computer.
Remove the service door:
1. Position the computer upside down.
2. Loosen the four captive Torx screws (1) that secure the door to the computer.
3. Lift the door on the computer (2).
1. Turn on the computer. If you are unsure whether the computer is on or in Hibernation, turn the computer on, and then shut it down through the operating system.
2. Disconnect the power from the computer by unplugging the power cord from the computer.
3. Disconnect all external devices from the computer.
Remove the service door:
1. Position the computer upside down.
2. Loosen the four captive Torx screws (1) that secure the door to the computer.
3. Lift the door on the computer (2).
How
to remove Bottom cover
1. Turn on the computer. If
you are unsure whether the computer is oƫ or in Hibernation, turn the computer
on, and then shut it down through the operating system.
2. Disconnect the power from the computer by unplugging the power cord from the computer.
3. Disconnect all external devices from the computer.
4. Remove the service door
Remove the bottom cover:
1. Loosen the seven captive Torx screws (1) that secure the bottom cover to the computer.
2. Lift the bottom cover on the computer (2).
2. Disconnect the power from the computer by unplugging the power cord from the computer.
3. Disconnect all external devices from the computer.
4. Remove the service door
Remove the bottom cover:
1. Loosen the seven captive Torx screws (1) that secure the bottom cover to the computer.
2. Lift the bottom cover on the computer (2).
How
to remove Battery
Before removing the battery,
follow these steps:
1. Turn on the computer. If you are unsure whether the computer is oƫ or in Hibernation, turn the computer on, and then shut it down through the operating system.
2. Disconnect the power from the computer by unplugging the power cord from the computer.
3. Disconnect all external devices from the computer.
4. Remove the service door
5. Remove the bottom cover
Remove the battery:
1. Turn on the computer. If you are unsure whether the computer is oƫ or in Hibernation, turn the computer on, and then shut it down through the operating system.
2. Disconnect the power from the computer by unplugging the power cord from the computer.
3. Disconnect all external devices from the computer.
4. Remove the service door
5. Remove the bottom cover
Remove the battery:
1. Disconnect the battery
cable from the system board (1).
2. Remove the six Phillips PM2.5×4.0 screws (2) that secure the battery to the computer.
3. Remove the battery from the computer (3).
2. Remove the six Phillips PM2.5×4.0 screws (2) that secure the battery to the computer.
3. Remove the battery from the computer (3).
How
to remove Hard drive
Before removing the hard drive,
follow these steps:
1. Turn on the computer. If you are unsure whether the computer is oƫ or
in Hibernation, turn the computer on, and then shut it down through the
operating system.
2. Disconnect the power from the computer by unplugging the power cord from the computer.
3. Disconnect all external devices from the computer.
4. Remove the service door =
5. Remove the bottom cover =
6. Remove the battery =
Remove the hard drive:
1. Loosen the six captive Phillips screws (1) that secure the hard drive to the computer.
2. Lift the hard drive enough to access connector under the top left bracket, and then disconnect the hard
drive cable from the system board (2).
3. Lift the hard drive out of the computer (3)’
2. Disconnect the power from the computer by unplugging the power cord from the computer.
3. Disconnect all external devices from the computer.
4. Remove the service door =
5. Remove the bottom cover =
6. Remove the battery =
Remove the hard drive:
1. Loosen the six captive Phillips screws (1) that secure the hard drive to the computer.
2. Lift the hard drive enough to access connector under the top left bracket, and then disconnect the hard
drive cable from the system board (2).
3. Lift the hard drive out of the computer (3)’
How
to remove RTC battery
Before removing the RTC battery,
follow these steps:
1. Turn on the computer. If you are unsure whether the computer is oƫ or in Hibernation, turn the computer on, and then shut it down through the operating system.
2. Disconnect the power from the computer by unplugging the power cord from the computer.
3. Disconnect all external devices from the computer.
4. Remove the service door
5. Remove the bottom cover
6. Disconnect the battery
7. If installed, remove the hard drive
Remove the RTC battery:
1. Disconnect the RTC battery cable (1) from the system board.
2. Detach the RTC battery (2) from the base enclosure. (The RTC battery is attached to the base enclosure
with double-sided adhesive.)
1. Turn on the computer. If you are unsure whether the computer is oƫ or in Hibernation, turn the computer on, and then shut it down through the operating system.
2. Disconnect the power from the computer by unplugging the power cord from the computer.
3. Disconnect all external devices from the computer.
4. Remove the service door
5. Remove the bottom cover
6. Disconnect the battery
7. If installed, remove the hard drive
Remove the RTC battery:
1. Disconnect the RTC battery cable (1) from the system board.
2. Detach the RTC battery (2) from the base enclosure. (The RTC battery is attached to the base enclosure
with double-sided adhesive.)
How
to remove Keyboard
Before removing the keyboard,
follow these steps:
1. Turn on the computer. If you are unsure whether the computer is oƫ or in Hibernation, turn the computer on, and then shut it down through the operating system.
2. Disconnect the power from the computer by unplugging the power cord from the computer.
3. Disconnect all external devices from the computer.
4. Remove the service door
5. Remove the bottom cover
6. Remove the battery
7. Remove the thermal module
8. Remove the display cable
9. Remove the solid-state drive
10. Remove the WLAN module
11. Remove the system board
Remove the keyboard:
1. Partially open the computer.
2. Rest and secure the computer on its left side.
3. Insert a thin tool into the keyboard release hole, and then press on the back of the keyboard until the keyboard disengages from the computer (1).
1. Turn on the computer. If you are unsure whether the computer is oƫ or in Hibernation, turn the computer on, and then shut it down through the operating system.
2. Disconnect the power from the computer by unplugging the power cord from the computer.
3. Disconnect all external devices from the computer.
4. Remove the service door
5. Remove the bottom cover
6. Remove the battery
7. Remove the thermal module
8. Remove the display cable
9. Remove the solid-state drive
10. Remove the WLAN module
11. Remove the system board
Remove the keyboard:
1. Partially open the computer.
2. Rest and secure the computer on its left side.
3. Insert a thin tool into the keyboard release hole, and then press on the back of the keyboard until the keyboard disengages from the computer (1).
4. Remove the
keyboard (2).
Wednesday, 10 July 2019
Acer Laptop disassembling – Acer Aspire V3-571 - V3-571G – Step by step disassembling procedure – BIOS flash – DOS flash utility – Crisis disk utility Acer Aspire V3-571 - V3-571G
Acer Aspire V-3 571 Laptop disassembly
BIOS
Flash
BIOS Flash memory updates are required for the following conditions:
# New versions of system programs
# New features or options
# Restore a BIOS when it becomes corrupted.
Use the Flash utility to update the system BIOS Flash ROM.
Perform the following to run a BIOS Flash update:
1. Prepare a bootable USB HDD/FDD.
2. Download and copy the Flash utilities to the bootable USB HDD/FDD.
BIOS Flash may be performed by one of the following:
# DOS Flash Utility
# WinFlash Utility
BIOS Flash memory updates are required for the following conditions:
# New versions of system programs
# New features or options
# Restore a BIOS when it becomes corrupted.
Use the Flash utility to update the system BIOS Flash ROM.
Perform the following to run a BIOS Flash update:
1. Prepare a bootable USB HDD/FDD.
2. Download and copy the Flash utilities to the bootable USB HDD/FDD.
BIOS Flash may be performed by one of the following:
# DOS Flash Utility
# WinFlash Utility
DOS
Flash Utility
NOTE:
Plug the AC power adaptor to a power source before performing the DOS Flash Utility.
Perform the following to use the DOS Flash Utility:
1. Copy Flash.BAT to the USB HDD.
2. Press F2 during boot to enter the BIOS Setup Utility.
3. Select Boot menu to modify the boot priority order.
4. Move the USB HDD to position 1
NOTE:
Plug the AC power adaptor to a power source before performing the DOS Flash Utility.
Perform the following to use the DOS Flash Utility:
1. Copy Flash.BAT to the USB HDD.
2. Press F2 during boot to enter the BIOS Setup Utility.
3. Select Boot menu to modify the boot priority order.
4. Move the USB HDD to position 1
5. Insert the USB HDD and
reboot the computer.
6. Enter the BIOS folder.
7. At the command prompt, type BIOS.bat and press Enter to update BIOS.
6. Enter the BIOS folder.
7. At the command prompt, type BIOS.bat and press Enter to update BIOS.
Creating
a USB Flash Crisis Disk
To create a Crisis USB flash disk, perform the following:
1. Plug in the USB flash disk.
2. Format the USB flash disk: select Quick Format, then click Start and then OK.
To create a Crisis USB flash disk, perform the following:
1. Plug in the USB flash disk.
2. Format the USB flash disk: select Quick Format, then click Start and then OK.
3. Complete the format
operation: click OK and then Close.
4. At the command prompt,
copy and combine KBC (*.ROM) and BIOS (*.BIN) into one ROM file
(*.FD), using the format below:
Copy /b filenam.ROM + filename.BIN filename.FD
(*.FD), using the format below:
Copy /b filenam.ROM + filename.BIN filename.FD
5. In Windows, copy the ROM
(*.FD) file to the USB flash disk root directory.
NOTE: Do not save another
ROM (*.FD) file in the USB flash disk root directory.
6. Rename the ROM file to “Q5WV1X64.fd”.
Using
the Crisis Utility Disk
1. Unplug the AC adapter.
2. Remove the battery.
3. Plug the USB flash disk.
4. Press and
hold <Fn> and <Esc>, and then plug the AC adapter.
5. Press the Power button
to start the Crisis Utility.
Battery
Pack Removal
1. Place the computer on a flat surface with the battery side up.
2. Insert the plastic pry into the battery latch and slide to to release the lock.
3. Lift to remove the battery pack.
1. Place the computer on a flat surface with the battery side up.
2. Insert the plastic pry into the battery latch and slide to to release the lock.
3. Lift to remove the battery pack.
DISASSEMBLING PROCEDURE
Base Door Removal
Prerequisite:
Remove the battery
1. Remove the screws marked in the picture
Remove the battery
1. Remove the screws marked in the picture
2. Insert your finger into
the tab and lift to remove the base door.
The following modules are housed
under the base door:
# HDD (Hard Disk Drive) module
(A),
# WLAN Module (B),
# DIMM (Dual-In Memory Module) Module) (C),
# WLAN Module (B),
# DIMM (Dual-In Memory Module) Module) (C),
Base
Door
1. Align the base door tabs
into the lower case latches, then push to secure the base door.
2. Secure the screws.
ODD
Module Removal
Prerequisite:
Remove the battery
1. Remove the screw securing the ODD module to the lower case.
Remove the battery
1. Remove the screw securing the ODD module to the lower case.
2. Pull to remove the ODD
module out from the slot.
HDD
Module Removal
Prerequisite:
Remove the battery
1. Locate the HDD Module
2. Slide the HDD module to disconnect the HDD from the main board connector.
Remove the battery
1. Locate the HDD Module
2. Slide the HDD module to disconnect the HDD from the main board connector.
3. Pull by the plastic tab
to lift the HDD module.
Palm
Rest Removal
Prerequisite:
Remove the battery
1. Remove the 21 screws from the lower case.
Remove the battery
1. Remove the 21 screws from the lower case.
2. From the right side, pry
open the palm rest.
3. Continue to pry open the
palm rest from the bottom side to the left.
4. On the underside of the
palm rest, remove the adhesive tape covering the touch-pad cable connector.
5. Flip up the connector
clip to open, and then disconnect the touch-pad FFC (flat flexible cable).
Upper
Case Removal
Prerequisite:
Remove the battery
1. Remove the screw from the upper cover and the main board.
Remove the battery
1. Remove the screw from the upper cover and the main board.
2. From the right side, pry
to release the upper case latches.
3. Continue to pry the upper
case through the top side and to the left.
CAUTION:
Cables are connected underneath
the upper case. Do not completely lift the upper case.
4. On the underside of the upper case, disconnect the power board cable connector from the main board connector.
TIP: Push the connector clips outwards to remove the power board cable connector.
4. On the underside of the upper case, disconnect the power board cable connector from the main board connector.
TIP: Push the connector clips outwards to remove the power board cable connector.
5. Disconnect the touchpaper
cable connector from the main board connector.
6. Remove the adhesive tape
covering the keyboard cable connector.
7. Disconnect the keyboard
cable connector from the main board connector.
The following modules are found:
# DC-In Module (A)
# Speakers (B)
# LVDS Cable (C)
# Microphone Module (D),
# RTC Battery (E)
# USB Module (F)
# Speakers (B)
# LVDS Cable (C)
# Microphone Module (D),
# RTC Battery (E)
# USB Module (F)
Wednesday, 26 June 2019
BOSE LIFESTYLE 135 sandbar disassembling - step by step disassembling procedure
Sound
Bar Disassembly Procedures
1. Top Cover Removal
1.1 Remove the 12 screws securing the top cover.
Important Note:
1. When replacing the top cover screws, follow the sequence in Figure to avoid causing the top cover to bow.
2. Ensure no wire harness obstructs a screw hole or gets pinched by the top cover when replaced. When removing any internal part, make note of the wire dressing and it ensure it is maintained after replacing a part.
1.1 Remove the 12 screws securing the top cover.
Important Note:
1. When replacing the top cover screws, follow the sequence in Figure to avoid causing the top cover to bow.
2. Ensure no wire harness obstructs a screw hole or gets pinched by the top cover when replaced. When removing any internal part, make note of the wire dressing and it ensure it is maintained after replacing a part.
1.2 Flip over the sound bar
so the grille is facing up.
1.3 For CineMate 1SR version only, remove the AdaptIQ door on the left side.
1.4 Grasp the top cover at both ends and lift off.
2. Phase Guide Speaker Removal (Left or Right)
2.1 Remove the two screws securing the phase guide to the bottom panel.
2.2 Lift out the phase guide and remove the wire connector from the PCB.
Note: When replacing the phase guide, ensure the wire harness is wrapped along the back of the speaker and under the phase guide. For the right phase guide, ensure the wire harness does not extend around the AC PCB shield., Right Phase Guide Wire Routing.
1.3 For CineMate 1SR version only, remove the AdaptIQ door on the left side.
1.4 Grasp the top cover at both ends and lift off.
2. Phase Guide Speaker Removal (Left or Right)
2.1 Remove the two screws securing the phase guide to the bottom panel.
2.2 Lift out the phase guide and remove the wire connector from the PCB.
Note: When replacing the phase guide, ensure the wire harness is wrapped along the back of the speaker and under the phase guide. For the right phase guide, ensure the wire harness does not extend around the AC PCB shield., Right Phase Guide Wire Routing.
3. Twiddler Removal
3.1 Perform procedure 1 first.
3.2 Remove the four screws indicated in Figure.
3.2 Lift out the Twiddler
Note: Make note of the wiring configuration for use when attaching a replacement transducer.
4. Front Tweeter Removal
4.1 Perform procedure 1 and 8 first.
Note: Removing the IR/LED PCB will release the tweeter harness. Make note of the wire harness routing and ensure it is properly wired under the IR/ LED PCB when replaced.
4.2 Remove the two screws indicated in Figure.
4.3 Lift out the front tweeter.
3.1 Perform procedure 1 first.
3.2 Remove the four screws indicated in Figure.
3.2 Lift out the Twiddler
Note: Make note of the wiring configuration for use when attaching a replacement transducer.
4. Front Tweeter Removal
4.1 Perform procedure 1 and 8 first.
Note: Removing the IR/LED PCB will release the tweeter harness. Make note of the wire harness routing and ensure it is properly wired under the IR/ LED PCB when replaced.
4.2 Remove the two screws indicated in Figure.
4.3 Lift out the front tweeter.
5. DSP PCB Removal
5.1 Perform procedure 1 and 2 (left phase guide) first.
5.2 CineMate 1SR - remove the AdaptIQ bezel by releasing the two snaps indicated.
5.1 Perform procedure 1 and 2 (left phase guide) first.
5.2 CineMate 1SR - remove the AdaptIQ bezel by releasing the two snaps indicated.
5.3 Remove the cables from
the PCB. Use a U.FL extraction tool, such as Hirose part number U.FL-LPN-2(01),
to remove the U.FL connector. Use care when removing the U.FL connector to
avoid damaging the connector.
5.4 Remove the screw indicated in Figure securing the DSP PCB.
5.5 While using care not to bend the RF antenna, lift off the DSP PCB.
Note: When replacing the DSP PCB, use care not to bend the RF antenna or damage the U.FL connector when reconnecting. Press gently straight down to insert the U.FL connector. Excessive or angled pressure will damage the connector. When properly installed, the antenna cable will rotate freely about the connector. Do not rotate more than 1/8th of a turn to avoid damaging the connector.
5.4 Remove the screw indicated in Figure securing the DSP PCB.
5.5 While using care not to bend the RF antenna, lift off the DSP PCB.
Note: When replacing the DSP PCB, use care not to bend the RF antenna or damage the U.FL connector when reconnecting. Press gently straight down to insert the U.FL connector. Excessive or angled pressure will damage the connector. When properly installed, the antenna cable will rotate freely about the connector. Do not rotate more than 1/8th of a turn to avoid damaging the connector.
6. AMP PCB Removal
6.1 Perform procedure 1 first.
6.2 Remove the two screws indicated in Figure securing the Amp PCB.
6.3 Remove the wire harness connectors and ribbon cables from the PCB. Lift out the PCB.
Note: 1. When installing the Amp PCB, ensure the wires are properly dressed. Amp PCB Removal.
Note: 2. Avoid removing the metal heat spreader plate (located on the bottom of the AMP PCB). If it was removed, ensure a void-free thermal gel contact between the plate and the three IC location markings on the PCB. Reapply thermal gel if needed, Chromerics 65-00-GEL30-0010, Bose part number 369952-001S
6.1 Perform procedure 1 first.
6.2 Remove the two screws indicated in Figure securing the Amp PCB.
6.3 Remove the wire harness connectors and ribbon cables from the PCB. Lift out the PCB.
Note: 1. When installing the Amp PCB, ensure the wires are properly dressed. Amp PCB Removal.
Note: 2. Avoid removing the metal heat spreader plate (located on the bottom of the AMP PCB). If it was removed, ensure a void-free thermal gel contact between the plate and the three IC location markings on the PCB. Reapply thermal gel if needed, Chromerics 65-00-GEL30-0010, Bose part number 369952-001S
7. I/O PCB Removal
7.1 Perform procedure 1 and 6 first.
7.2 Remove the three screws indicated inf Figure securing the connector backup and I/O PCB. Lift out the connector backup and I/O PCB together.
7.3 Remove the ribbon cable from the I/O PCB. Remove the U.FL connector only if needed. Use a U.FL extraction tool, such as Hirose part number U.FL-LP-N-2(01), to remove the U.FL connector. Use care when removing the U.FL connector to avoid damaging the connector.
Note: When replacing the I/O PCB, use care not to damage the U.FL connector when reconnecting. Press gently straight down to insert the U.FL connector. Excessive or angled pressure will damage the connector. Apply glue to the cable as shown in Figure to relieve strain on the connector. When properly installed, the antenna cable will rotate freely about the connector. Do not rotate more than 1/8th of a turn to avoid damaging the connector.
7.2 Remove the three screws indicated inf Figure securing the connector backup and I/O PCB. Lift out the connector backup and I/O PCB together.
7.3 Remove the ribbon cable from the I/O PCB. Remove the U.FL connector only if needed. Use a U.FL extraction tool, such as Hirose part number U.FL-LP-N-2(01), to remove the U.FL connector. Use care when removing the U.FL connector to avoid damaging the connector.
Note: When replacing the I/O PCB, use care not to damage the U.FL connector when reconnecting. Press gently straight down to insert the U.FL connector. Excessive or angled pressure will damage the connector. Apply glue to the cable as shown in Figure to relieve strain on the connector. When properly installed, the antenna cable will rotate freely about the connector. Do not rotate more than 1/8th of a turn to avoid damaging the connector.
8. IR/ LED PCB Removal
8.1 Perform procedure 1 first.
8.2 CineMate 1SR only - lift off the mesh covering the IR/ LED PCB. Figure 13.
8.3 Remove the screw indicated in Figure securing the IR/LED PCB. Lift off the IR/LED PCB.
Note: It might be necessary to replace the mesh covering if the adhesive does not adhere when replaced,
8.1 Perform procedure 1 first.
8.2 CineMate 1SR only - lift off the mesh covering the IR/ LED PCB. Figure 13.
8.3 Remove the screw indicated in Figure securing the IR/LED PCB. Lift off the IR/LED PCB.
Note: It might be necessary to replace the mesh covering if the adhesive does not adhere when replaced,
9. AC PCB Removal
9.1 Perform procedure 1.
9.2 Remove the two screws indicated in Figure securing the AC PCB and insulator. Lift off the AC PCB and insulator
9.3 Remove the wire connector from the AC PCB.
Note: Ensure the AC PCB insulator is properly positioned over the AC PCB when installing. The open grove aligns with the opening for the top cover screw.
9.1 Perform procedure 1.
9.2 Remove the two screws indicated in Figure securing the AC PCB and insulator. Lift off the AC PCB and insulator
9.3 Remove the wire connector from the AC PCB.
Note: Ensure the AC PCB insulator is properly positioned over the AC PCB when installing. The open grove aligns with the opening for the top cover screw.
10. Power Supply PCB Removal
10.1 Perform procedure 1 and 2.
10.2 Remove the three screws indicated in Figure securing the power supply PCB. Remove the wire harness connectors and ribbon cables. Lift off the power supply PCB.
10.1 Perform procedure 1 and 2.
10.2 Remove the three screws indicated in Figure securing the power supply PCB. Remove the wire harness connectors and ribbon cables. Lift off the power supply PCB.
BOSE LIFESTYLE 135 - BOSE Cinemate 1SR – Pairing the bass module and sound bar – performance test
BOSE LIFESTYLE 135:
Pairing a Sound Bar to a Bass Module
Overview
The sound bar RF ID is stored in the bass module. Once the RF ID is stored, the sound bar will only communicate to the bass module it has been paired with. If you are testing a customer soundbar or bass module with a test soundbar or bass module, it is necessary to pair the customer device to the bench test device. If you pair a customer soundbar or bass module to a test device, provide the customer instructions to pair their system when returned. A maximum of four paired sound bar and bass modules can operate in close proximity.
Wired Connection
If using in an application such as a hotel or areas where RF interference might occur, a SMB wired connection should be used. When using the wired connection, the sound bar will pair automatically with the bass module. 331731-0010 : 4 meter SMB to SMB Coax Cable (used for end user wired connection) 345328-0010 : 1 meter SMB to F Coax Cable (two used for wiring up to 100’)
1. CineMate 1SR End User Pairing Instructions
1.1 Unplug the Acoustimass module AC power cord.
1.2 Remove the door on the end of the speaker array.
1.3 Press and hold the ADAPTiQ button for 3-4 seconds until the status indicator starts slowly blinking orange.
1.4 Plug the Acoustimass module AC power cord in the AC outlet.
Pairing is complete when the Acoustimass module status indicator becomes solid orange and the speaker array status indicator turns off.
The sound bar RF ID is stored in the bass module. Once the RF ID is stored, the sound bar will only communicate to the bass module it has been paired with. If you are testing a customer soundbar or bass module with a test soundbar or bass module, it is necessary to pair the customer device to the bench test device. If you pair a customer soundbar or bass module to a test device, provide the customer instructions to pair their system when returned. A maximum of four paired sound bar and bass modules can operate in close proximity.
Wired Connection
If using in an application such as a hotel or areas where RF interference might occur, a SMB wired connection should be used. When using the wired connection, the sound bar will pair automatically with the bass module. 331731-0010 : 4 meter SMB to SMB Coax Cable (used for end user wired connection) 345328-0010 : 1 meter SMB to F Coax Cable (two used for wiring up to 100’)
1. CineMate 1SR End User Pairing Instructions
1.1 Unplug the Acoustimass module AC power cord.
1.2 Remove the door on the end of the speaker array.
1.3 Press and hold the ADAPTiQ button for 3-4 seconds until the status indicator starts slowly blinking orange.
1.4 Plug the Acoustimass module AC power cord in the AC outlet.
Pairing is complete when the Acoustimass module status indicator becomes solid orange and the speaker array status indicator turns off.
2. Lifestyle 135 End User Pairing Instructions.
2.1 Using the system cable, connect the soundbar to the control console.
2.2 Apply power to the console, soundbar, and bass module.
2.3 Press the Setup button on the control console and select the “Reconnect Acoustimass” menu item..
3. Pairing using a SMB cable
3.1 Connect SMB cable, part number 331731-0010, to the sound bar and bass module.
3.2 Connect power to the soundbar and bass module.
3.3 A solid orange LED on the bass module indicates paring is complete.
3.4 To avoid the soundbar or bass module from pairing with another system in the repair area, remove power from both components before removing the SMB cable.
2.1 Using the system cable, connect the soundbar to the control console.
2.2 Apply power to the console, soundbar, and bass module.
2.3 Press the Setup button on the control console and select the “Reconnect Acoustimass” menu item..
3. Pairing using a SMB cable
3.1 Connect SMB cable, part number 331731-0010, to the sound bar and bass module.
3.2 Connect power to the soundbar and bass module.
3.3 A solid orange LED on the bass module indicates paring is complete.
3.4 To avoid the soundbar or bass module from pairing with another system in the repair area, remove power from both components before removing the SMB cable.
Setting
The Region Variant – CineMate 1SR Only
1. Setting
the Region Variant - CineMate 1SR Only
There are 4 variants of the CineMate 1 SR sound bar (US/AIM, EURO/UK, Asia Pacific, Japan) that have separate AdaptiQ language lists. When replacing DSP PCB in a US, Asia/PAC, and Japan variant, the variant needs to be set to present the proper AdaptiQ language selection list. The UK/EURO variant does not need to be set. The US, Asia/PAC, and Japan version use the same version of a programmed IC containing the language list. The EU/UK version uses a programmed IC that contains just the EU/UK langue list.
1.1 Issue TAP commands.
1.2 Enter the TAP command TN 65 ON, to turn on the sound bar.
1.3 Enter the appropriate TAP command from the table below to set the variant
There are 4 variants of the CineMate 1 SR sound bar (US/AIM, EURO/UK, Asia Pacific, Japan) that have separate AdaptiQ language lists. When replacing DSP PCB in a US, Asia/PAC, and Japan variant, the variant needs to be set to present the proper AdaptiQ language selection list. The UK/EURO variant does not need to be set. The US, Asia/PAC, and Japan version use the same version of a programmed IC containing the language list. The EU/UK version uses a programmed IC that contains just the EU/UK langue list.
1.1 Issue TAP commands.
1.2 Enter the TAP command TN 65 ON, to turn on the sound bar.
1.3 Enter the appropriate TAP command from the table below to set the variant
US TN 33 1
Asia/Pac TN 33 3
Japan TN 33 4
Asia/Pac TN 33 3
Japan TN 33 4
Lifestyle
135 Performance Verification Procedures
Required
Equipment
1. Tera Term terminal emulator - download at sourceforge.jp/projects/ttssh2/
2. TAP cable 264565 ( used for TAP commands)
3. TAP cable 299656 (used for COAX input and Turn on voltage)
4. An A/D converter and audio generator
5. Lifestyle 135 Bass Module
6. SMB cable part number 331731-0010 or equivalent.
7. Computer setup to issue TAP commands
8. A paired soundbar and bass module -
1. Sound Bar Air Leak Test
1.1 Issue the following TAP commands
SO BDSP (resets DSP)
SO L,ALL (sends left input to all channels)
SO 0,8 (mutes bass channel)
VO CB 20 (sets volume level)
1.2 Apply a 285 Hz, 85 mVrms signal to the A/D converter.
1.3 Listen for any air leaks from sealed enclosures for the twiddlers, tweeter, and phase guide arrays.
2. Sound Bar Buzz Test and Sweep Test
2.1 Issue the following TAP commands
1. Tera Term terminal emulator - download at sourceforge.jp/projects/ttssh2/
2. TAP cable 264565 ( used for TAP commands)
3. TAP cable 299656 (used for COAX input and Turn on voltage)
4. An A/D converter and audio generator
5. Lifestyle 135 Bass Module
6. SMB cable part number 331731-0010 or equivalent.
7. Computer setup to issue TAP commands
8. A paired soundbar and bass module -
1. Sound Bar Air Leak Test
1.1 Issue the following TAP commands
SO BDSP (resets DSP)
SO L,ALL (sends left input to all channels)
SO 0,8 (mutes bass channel)
VO CB 20 (sets volume level)
1.2 Apply a 285 Hz, 85 mVrms signal to the A/D converter.
1.3 Listen for any air leaks from sealed enclosures for the twiddlers, tweeter, and phase guide arrays.
2. Sound Bar Buzz Test and Sweep Test
2.1 Issue the following TAP commands
SO BDSP
(resets DSP)
VO CB 20 (sets volume level)
SO 0,8 (mutes bass channel)
2.2 Apply a 200 Hz, 85 mVrms signal to the left input of the A/D converter.
2.3 Sweep the audio generator form 200 Hz to 2 kHz.
2.4 Listen for buzz, rub, or extraneous sounds.
Localize and repair any buzz. Replace any transducer that rubs or produces extraneous sounds.
2.5 Issue the TAP command VO CB 20 to set the volume level.
2.6 Apply a 200 Hz, 60 mVrms signal to the left and right input
2.7 Sweep the audio generator form 200 Hz to 2 kHz.
VO CB 20 (sets volume level)
SO 0,8 (mutes bass channel)
2.2 Apply a 200 Hz, 85 mVrms signal to the left input of the A/D converter.
2.3 Sweep the audio generator form 200 Hz to 2 kHz.
2.4 Listen for buzz, rub, or extraneous sounds.
Localize and repair any buzz. Replace any transducer that rubs or produces extraneous sounds.
2.5 Issue the TAP command VO CB 20 to set the volume level.
2.6 Apply a 200 Hz, 60 mVrms signal to the left and right input
2.7 Sweep the audio generator form 200 Hz to 2 kHz.
2.8 Listen
for buzz, rub, or extraneous sounds.
Localize and repair any buzz. Replace any transducer that rubs or produces extraneous sounds.
2.9 Apply a 200 Hz, 85 mVrms signal to the right input of the A/D converter.
2.10 Listen for buzz, rub, or extraneous sounds. Localize and repair any buzz. Replace any transducer that rubs or produces extraneous sounds.
3. Transducer Operational Test
3.1 Issue TAP commands to generate audio for each transducer. The sound bar will generate this tone internally
3.2 Listen for clean undistorted audio from each transducer.
Verify Bass Module Link
4.1 Issue the following TAP commands
SO BDSP (resets DSP)
VO CB 20 (sets volume level)
SO L,8 (Routes left channel to bass box)
4.2 Apply a 85mv, 40 Hz signal to the A/D converter.
4.3 Listen for clean undistorted audio from the bass module.
Localize and repair any buzz. Replace any transducer that rubs or produces extraneous sounds.
2.9 Apply a 200 Hz, 85 mVrms signal to the right input of the A/D converter.
2.10 Listen for buzz, rub, or extraneous sounds. Localize and repair any buzz. Replace any transducer that rubs or produces extraneous sounds.
3. Transducer Operational Test
3.1 Issue TAP commands to generate audio for each transducer. The sound bar will generate this tone internally
3.2 Listen for clean undistorted audio from each transducer.
Verify Bass Module Link
4.1 Issue the following TAP commands
SO BDSP (resets DSP)
VO CB 20 (sets volume level)
SO L,8 (Routes left channel to bass box)
4.2 Apply a 85mv, 40 Hz signal to the A/D converter.
4.3 Listen for clean undistorted audio from the bass module.
5. Bass
Module Air Leak
5.1 Issue the following TAP commands
SO BDSP (resets DSP)
VO CB 20 (sets volume level)
5.2 Mute the sound bar channels by issuing the following TAP commands
SO 0,0
SO 0,1
SO 0,2
SO 0,3
SO 0,4
SO 0,5
SO 0,6
SO 0,7
5.3 Apply a 50 Hz, 100 mVrms signal to the A/D converter
5.4 Listen for air leaks from the bass module seams and module cover.
6. Bass Module Sweep Test
6.1 Issue the following TAP commands
SO BDSP (resets DSP)
VO CB 20 (sets volume level)
6.2 Apply a 40 Hz, 100 mVrms signal to the A/D converter.
6.3 Sweep the audio generator from 40 - 300 Hz.
6.4 Listen for buzz, rub, or extraneous sounds.
Localize and repair any buzz. Replace any transducer that rubs or produces extraneous sounds.
7. RF Testing, Wired
7.1 Connect SMB cable part number 331731-0010 to the soundbar Acoustimass and bass module speaker array connectors.
7.2 Enter TAP command “RF DI” to retrieve the
Device ID from the soundbar.
Expected Output:
DEVICE_ID : 0x2001742B
MANF_ID : 0x0000B05E
PROD_ID : 0x01000001
5.1 Issue the following TAP commands
SO BDSP (resets DSP)
VO CB 20 (sets volume level)
5.2 Mute the sound bar channels by issuing the following TAP commands
SO 0,0
SO 0,1
SO 0,2
SO 0,3
SO 0,4
SO 0,5
SO 0,6
SO 0,7
5.3 Apply a 50 Hz, 100 mVrms signal to the A/D converter
5.4 Listen for air leaks from the bass module seams and module cover.
6. Bass Module Sweep Test
6.1 Issue the following TAP commands
SO BDSP (resets DSP)
VO CB 20 (sets volume level)
6.2 Apply a 40 Hz, 100 mVrms signal to the A/D converter.
6.3 Sweep the audio generator from 40 - 300 Hz.
6.4 Listen for buzz, rub, or extraneous sounds.
Localize and repair any buzz. Replace any transducer that rubs or produces extraneous sounds.
7. RF Testing, Wired
7.1 Connect SMB cable part number 331731-0010 to the soundbar Acoustimass and bass module speaker array connectors.
7.2 Enter TAP command “RF DI” to retrieve the
Device ID from the soundbar.
Expected Output:
DEVICE_ID : 0x2001742B
MANF_ID : 0x0000B05E
PROD_ID : 0x01000001
7.3 Read
back connection status by issuing TAP command “rf gs” to the bass module
Expected Output:
0x2001742B 0x0000B05E 0x00001ED5
0x99
0x0020
0x00- 0x00- 0x00- 0x00- 0x00- 0x05+ 0x00- 0x00-
0x00 0x00- 0x00- 0x00- 0x00- 0x00- 0x00- 0x00-
-42
40275
0x0D
832
0x0020
7.4 Verify the network ID (line 1, word 1) matches the Device ID retrieve in step 7.2. This indicates the soundbar and bass module are paired.
7.5 Verify RSSI (line 5) is (< -20) AND (>= -45)
8. Antenna and RF Testing, Wireless
8.1 Place the port of the bass module 3 feet from the left side of the sound bar.
Note: Surfaces in the test area will impact this measurement. Comparing results to a known good system will improve the accuracy of this test for your area.
8.2 Enter TAP command “RF DI” to retrieve the Device ID from the soundbar.
Expected Output:
DEVICE_ID : 0x2001742B
MANF_ID : 0x0000B05E
PROD_ID : 0x01000001
8.3 Read back connection status by issuing TAP command “rf gs” to the bass module. Expected Output:
0x2001742B 0x0000B05E 0x00001ED5
0x99
0x0020
0x00- 0x00- 0x00- 0x00- 0x00- 0x05+ 0x00- 0x00-
0x00 0x00- 0x00- 0x00- 0x00- 0x00- 0x00- 0x00-
-37
40275
0x0D
832
0x0020
8.4 Verify the network ID (line 1, word 1) matches the Device ID retrieve in step 7.2. This indicates the soundbar and bass module are paired.
8.5 Verify RSSI (line 5) is (< -20) AND (> -40)
Note: RSSI (Receive Signal Strength Indicator)
0x2001742B 0x0000B05E 0x00001ED5
0x99
0x0020
0x00- 0x00- 0x00- 0x00- 0x00- 0x05+ 0x00- 0x00-
0x00 0x00- 0x00- 0x00- 0x00- 0x00- 0x00- 0x00-
-42
40275
0x0D
832
0x0020
7.4 Verify the network ID (line 1, word 1) matches the Device ID retrieve in step 7.2. This indicates the soundbar and bass module are paired.
7.5 Verify RSSI (line 5) is (< -20) AND (>= -45)
8. Antenna and RF Testing, Wireless
8.1 Place the port of the bass module 3 feet from the left side of the sound bar.
Note: Surfaces in the test area will impact this measurement. Comparing results to a known good system will improve the accuracy of this test for your area.
8.2 Enter TAP command “RF DI” to retrieve the Device ID from the soundbar.
Expected Output:
DEVICE_ID : 0x2001742B
MANF_ID : 0x0000B05E
PROD_ID : 0x01000001
8.3 Read back connection status by issuing TAP command “rf gs” to the bass module. Expected Output:
0x2001742B 0x0000B05E 0x00001ED5
0x99
0x0020
0x00- 0x00- 0x00- 0x00- 0x00- 0x05+ 0x00- 0x00-
0x00 0x00- 0x00- 0x00- 0x00- 0x00- 0x00- 0x00-
-37
40275
0x0D
832
0x0020
8.4 Verify the network ID (line 1, word 1) matches the Device ID retrieve in step 7.2. This indicates the soundbar and bass module are paired.
8.5 Verify RSSI (line 5) is (< -20) AND (> -40)
Note: RSSI (Receive Signal Strength Indicator)
Subscribe to:
Posts (Atom)
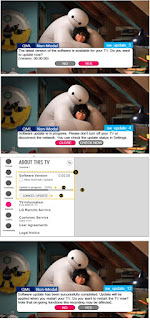
LG 32LK610BPUA, LG 32LK610BBUA LCD TVs – How to upgrade the software, fault checking method
Software update procedure USB (1) Insert the USB memory Stick to the USB port (2) Automatically detect the SW Version and show the bel...
-
ERROR CODE CAUSES AND SOLUTION - LG split AC CH 01 Indoor air sensor Connector connection error Faulty PCB Faulty sensor (Open ...
-
KSV 26CRE, KSV 35CRE, KSV 70CRE, KSV 26HRE, KSV 35HRE, KSV 53HRE, KSV 62HRE, KSV 70HRE and KSV 80HRE Models Communication Fault * D...
-
How to enter into Service Mode 1: Press Menu, 2: Input “8893”, System will be into the factory mode menu when 2 steps above are done....